Do you have old custom apparel equipment that you no longer need? Something you tucked away in the attic or basement… and is just collecting dust for months or years?
The equipment is too good to be thrown away, you just don’t know what to do with it.
But, what if… there’s somebody out there, actively looking for the exact thing you’re sitting on. And knows exactly how to put it to good use.
So, the question is shouldn’t you consider selling the equipment to that person? It could be anything from a heat press or computer to a cutter or printer.
You can sell ANYTHING as long as you follow the steps laid out in this article.
How To Get Your Equipment Ready to Sell
The first step is to roll up your sleeves and give your item a good, deep clean. Start off by making sure the outside surface of your item is tidy and clean. Gently wipe the surface with a dry cloth (or microfiber towel ideally) to remove any dust or debris that’s built up over time.
The important thing is to wipe everything down.
Now, if you’re staring at that one spot and wondering how you’re going to get it out… you can try using a product that’s made to remove scratches, scuffs and just improve the overall look.
Or… you can also look into some of the natural solutions that do the same thing.
This step helps freshen up your equipment and brings it back to a bright life. You want to make the first impression as someone who’s taken good care of the product. And if you’re going to maximize the value of it (and get the best price for it), it better looks the part.

Choosing a Good Place for Photoshoot
How do you choose the perfect place for a photoshoot? Do you pick your basement and take photos there… or… is it better to use an attic for the shoot?
Well, here’s couple of things that may help you pick the right place:
#1 Lighting – If you’re shooting inside, take a good look at your surroundings… there’s probably a room that has more windows and natural sunlight coming in. Go to that room…. because you need light! It’s an essential part of good photography.
For one, sunlight will naturally brighten up the whole room. And for the second, it’s going to fill the room with warm and welcoming tones. All combined will make the product or products look as good as possible.
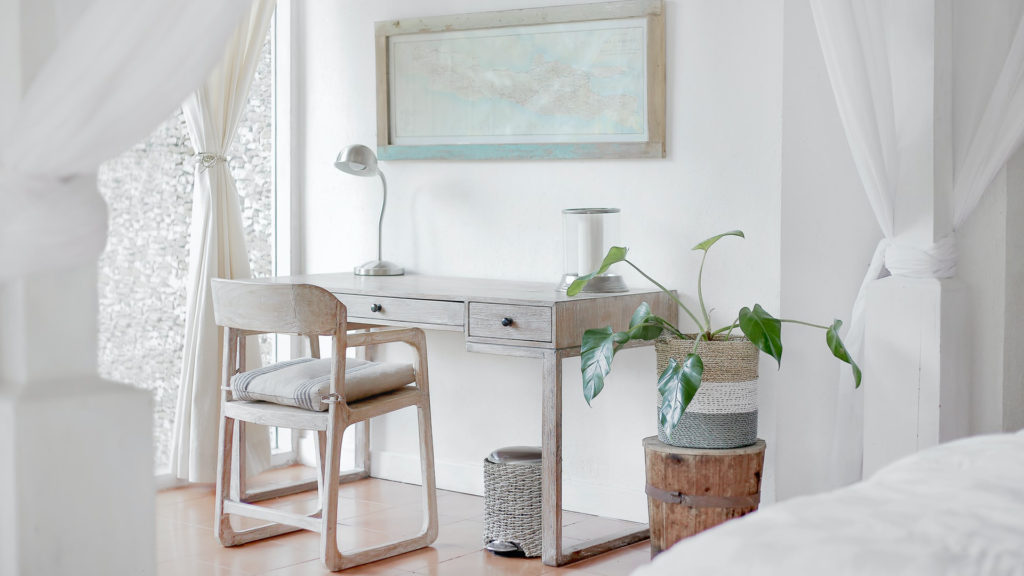
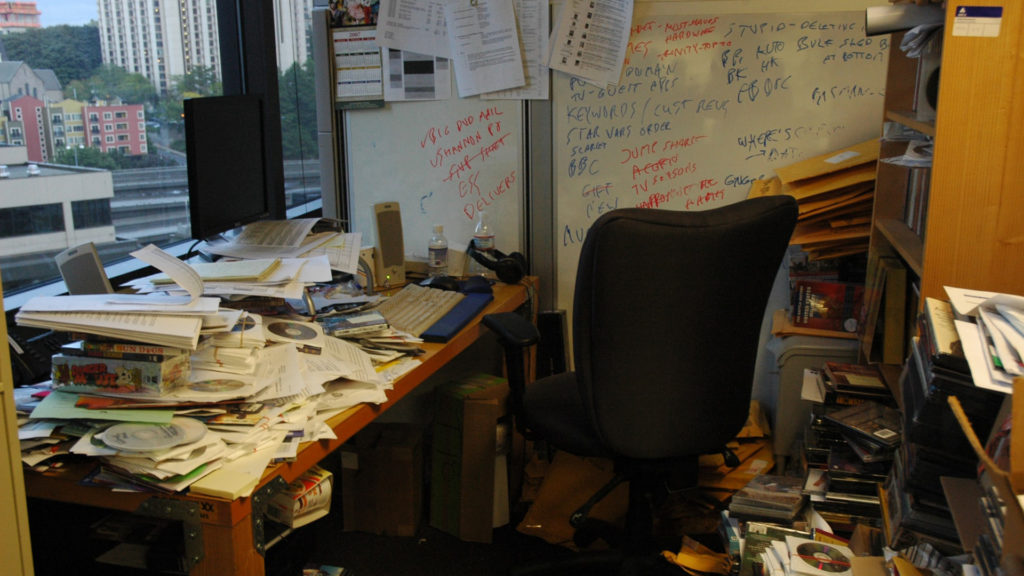
#2 Background – Now that you’ve found a room, you want to declutter it. Remove all of the unnecessary items that are in the way. You don’t want others to see your mess, right?
But more importantly, you’re doing it for the equipment. You want to display the product in a clean and non-distracting way. It has to stand out and be the center of attention. And a clean background is going to help you do just that.
#3 Composition – You’re almost ready to snap some photos. What’s left to do is rearrange your equipment… experiment with different arrangements, try to place it in a position that highlights the product and makes it more attractive to viewers.
You are more than welcome to include the original packaging in the frame as well. Maybe the item came with user manuals and stickers or original papers… be sure to include that, too.
Things like that tend to increase the value of ANY item, virtually.
Show Your Item’s Most Important Qualities
Okay. You’ve prepared everything — you’ve taken good care of the item, lighting is good in the room, and you’ve even cleared the clutter from the background.
What’s next? Now’s the right time to snap some photos. Really try to put yourself in the shoes of a potential buyer who’s browsing the marketplace. And ask yourself: ‘’If I was in the market for this item, what would I want to see? What would be important to me?
Listen, people can’t just hop through their computer screen and get answers. So, that’s why your photos are going to be an answer to those questions. A picture is worth a thousand words, remember?!
So, this step is where you get to show what you’ve got. Take shots at different angles, distances, and positions to show potential buyers what your product looks like.
To give a better understanding of how the product works, you can take pictures of it in use… or… put the product in a context. That would help buyers envision themselves using it.
Conclusion
Taking good pictures can be a challenge, even in the most ideal situations. Everything can line up ‘’just right’’ and you’ll still end up with poor photos. It’s just how it works sometimes.
The most important thing is to NOT blame yourself. You can ALWAYS try again… and eventually… you’ll get there, my friend.
Especially, if you’re this far in the article. It means you care, you really want to do well. And I can assure you this: it won’t take long until you make professional-quality photos.
So, thank you for sticking until the end.